Free shipping on Continental USA orders $99+ | Need help? Email us at support@diywrapclub.com or text us at 423-529-2421 | Helping 200,000+ DIY installers since 2018. Shop Now

    DIY Side & Rear Protection Kit – PPF for Model 3 Highland

    Sale

    DIY Side & Rear Protection Kit – PPF for Model 3 Highland

    Sale
    Version: Standard
    Style: With Logo Cutout

    Why Shipping Times Vary
    We don’t keep old vinyl sitting on shelves. When you order, we get a fresh roll straight from our supplier so your kit’s made with the newest, cleanest material. Some colors take a little longer to arrive, but once it hits our shop in Chattanooga, TN, we cut and ship your kit right away.
    Because each kit is made specifically for you with freshly ordered material, all kits are considered custom and are non-returnable.
    Free Continental U.S. Shipping $99+

    Beginner Friendly

    Free Video Guides

    All Tools Included

    MADE IN USA

    Tesla Model 3 Highland PPF Finishing Kit – DIY Paint Protection Film

    Already installed our Tesla Model 3 Highland Front PPF Kit? Take the next step and protect the rest of your car with our PPF Finishing Kit, designed to cover all the remaining panels at once. This is the most cost-effective way to complete your DIY paint protection film install without buying individual rolls or duplicating your front kit.

    Looking for different protection?
    Check out our Front Protection Kitor go for Full Vehicle Protection.

    Coverage Included

    • Door panels & handles paint protection film
    • A-pillars PPF
    • Rear quarter panel PPF
    • Rear trunk PPF
    • Rear bumper PPF
    • Rocker panel PPF
    • Taillight PPF

    DIY-Ready Install Tools & Prep
    Your original front kit came with all the essential tools, so here we’ve included just the prep items you’ll need:

    • 70% Isopropyl Alcohol*
    • TESBROS Car Wash Shampoo
    • TESBROS Prep Wash
    • Clay Bar
    • Digital step-by-step video course for Model 3 Highland PPF installation
    • 8 x Slip Solution Packets

    Why Choose Our Tesla Model 3 Highland PPF Kits?

    • Save money by finishing the rest of your car without buying a full kit twice
    • DIY peel-and-apply installation with pro-level results
    • Protects against rock chips, scratches, UV damage, and road debris
    • Avery Supreme Defense GlossPPF – self-healing, 10-year durability
    • Designed and manufactured in the USA

    Fitment & Specs

    • Compatible with 2024+ Tesla Model 3 Highland
    • Lasts up to 10 years with proper care

    Please Note

    • This finishing kit does not include the front bumper, fenders, headlights, mirrors, or hood (covered in the Front Kit).
    • *Due to shipping restrictions, orders outside the continental U.S. do not include 70% Isopropyl Alcohol. U.S. orders ship ground only.

    NOTICE: Tesla recently announced that all Model 3 and Model Y's will no longer be equipped with Ultrasonic Sensors in favor of its "Tesla Vision" system.

    To figure out whether your Tesla is equipped with ultrasonic sensors or not, please review the image below.

    If you purchased our kit prior to your delivery and your Tesla does NOT have the sensors, please email us at support@diywrapclub.com for a replacement piece free of charge.

    If your car has 6 round sensors in the front or rear bumper, please choose "WITH SENSOR CUTOUTS".

    If your car has no round sensors anywhere on the front or rear bumper, please choose "NO SENSOR CUTOUTS" as your option.

    Can anyone install this?

    Yes, this kit was designed with beginners in mind! If this is your first PPF install, watch this video to see how it's done before you purchase!


    Do I need prior experience with PPF?

    Nope! We designed this kit for the average Joe. We include everything you need to learn as you go.

    What’s the difference between your kit and other PPF kits?

    We include in-depth courses that walk you through the installation process. Other kits require prior PPF knowledge, while ours is completely beginner-friendly.

    Do I have to disassemble parts of the car to apply the wrap?

    Not at all! Our kit was carefully designed to fit without removing anything or having to use a knife on the car.

    What’s the return policy on this kit?

    All kits are final sale. Since it's not good for the roll to stay on the shelf, we cut to order. Unless there was a special case, your kit would not be returnable so please review the intro courses to see if this is a good fit for you. 

    How long does PPF last?

    We use Avery Supreme Defense PPF that is rated for 10 years of durability. The film will not yellow or crack over time.

    How long does it take to install?

    This can depend on the person, but we estimate it will take 12-18 hours if installed alone. 

    Can I put ceramic coating over PPF?

    Absolutely. There are many ceramic coatings that are specifically for PPF which will make the car even easier to keep clean!

    Can I install PPF over ceramic coating?

    Unfortunately, PPF will not adhere to ceramic coating. We do not recommend installing if you already have a ceramic coat.

    This kit is not eligible for returns or refunds.

    Most customers install this themselves. We recommend watching the how to video to ensure correct usage.

    Watch Installation
    4.7
    Rated 4.7 out of 5 stars
    Based on 9 reviews
    Total 5 star reviews: 8 Total 4 star reviews: 0 Total 3 star reviews: 0 Total 2 star reviews: 1 Total 1 star reviews: 0
    89%would recommend these products
    Slide 1 selected
    9 reviews
    • MC
      Michael C.
      Verified Buyer
      1 week ago
      Rated 5 out of 5 stars
      Sleek Matte

      First time doing a wrap. The process itself is pretty easy but time consuming. I broke up sections over a few days and ensured the car was clean before placing. Stretching can be difficult in some places but keep working it and it will fit as needed.

      Getting assistance from support email was relatively easy. Overall I am satisfied with the product.

      Ease Of InstallRated 2.0 on a scale of 1 to 5
    • EP
      Efra P.
      Verified Buyer
      10 months ago
      Rated 5 out of 5 stars
      I am pleased with the results!

      I didn’t want to spend close to $2000 to apply PPF protection for my new Model 3. I took a risk in doing this myself as I have never done PPF protection. I was pleasantly surprised after I received the materials and watched the videos on how professional are the videos and great quality of the products I got. It gave me all the skills I needed to do the job myself.

      Ease Of InstallRated 4.0 on a scale of 1 to 5
    • LT
      Leonardo T.
      Verified Buyer
      1 year ago
      Rated 5 out of 5 stars
      Doable

      First of all, TESBROS’ customer service is amazing, which is why bought from them rather than a competitor. The instruction videos are very good. If you watch them, you’ll be able to install the kit. A few lessons I’ve learned in the process:

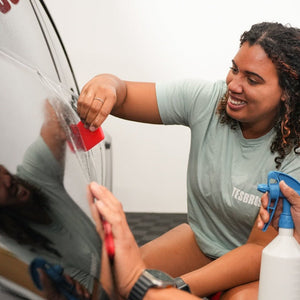
      1. This is not particularly hard. It is particularly time consuming, so you’ll have to be patient to get good results. It took me 4 hours to prep the environment (vacuuming walls and floor of the garage) and the car (washing, prep washing, and claying). I’ve spent 24 hours installing film and am halfway through the kit (doors, fenders, front bumper, mirrors, and pillars). In summary, be mentally ready for a 50-hour project.

      2. Work from easier to harder panels to get practice. Pillars > Hood > Doors > Mirrors > Trunk > Quarter Panels > Fenders > Rockers > Back Bumper > Front Bumper

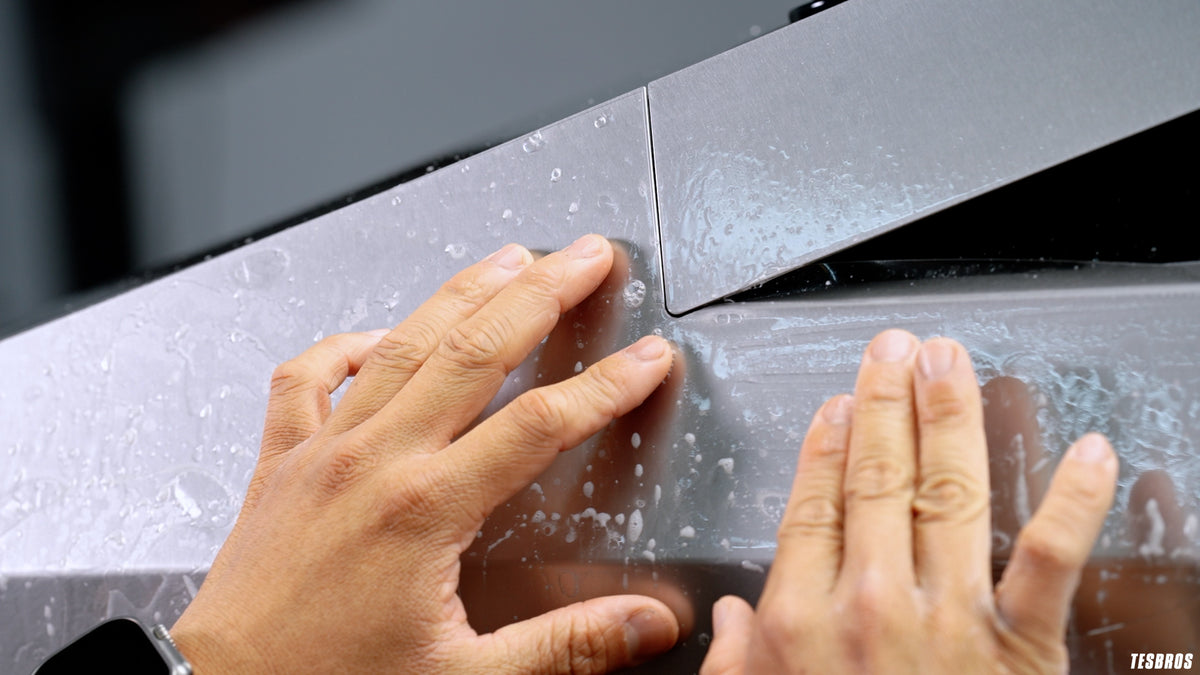
      3. Double check for issues as you go. Before doing a second squeegee pass on an area (what they call a “double take”), wipe it dry and check for contamination and bubbles. It’s much easier to fix problems at that point than after the whole panel is done.

      4. Overhang should be at least ~5mm for edges to be wrapped, stretching the film if needed. Stop just short of the edge everywhere else. Stopping 1mm short of the edge is better leaving 1mm overhang, as you may not be able to wrap that and have to resort to cutting.

      5. Tack edges and let them dry for a few hours prior to wrapping them. Sometimes you’ll have to apply pressure and hold for a couple of…

    • EBProfile picture for Eric B.
      Eric B.
      Verified Buyer
      1 year ago
      Rated 5 out of 5 stars
      Amazing Value!

      I recently installed this on my 2025 Model 3 the day of delivery and highly recommended the full front kit. The set by step video instructions were excellent and I had no issues installing. Everything was cut perfectly and seemed of excellent quality. I had no experience with PPF prior to this install and everything come out nearly perfect!

      Ease Of InstallRated 4.0 on a scale of 1 to 5
    • JB
      Jeremy B.
      Verified Buyer
      1 year ago
      Rated 5 out of 5 stars
      If you are on the fence, just order already

      I had my doubts about the DIY PPF, but so happy I ordered it. First let me start this review with a bunch a praise for the customer service at TESBROS. I seriously think they have the best customer service that a business could have. I ordered the matte PPF for my model 3 highland with a debadged kit. The kit arrived as a badged kit and one of the fender cameras didn’t have the cutout. They were very prompt to send the correct pieces. As a first time, I progressively got better at laying the PPF. A friendly tip, don’t be afraid to have too much slip than not enough…below and on top of the PPF. I realized I was using not enough slip and it was hard to get the bubbles out…using a lot of slip makes it easy to get your tac points then glide all the bubbles out. The online videos help build confidence and they do a great job. I am happy with how it turned out…it isn’t a pro job if you are looking close at some of how the pieces line up but I am my worst critic and the only one that will notice.