
How do you wash your Model Y Juniper before you start installing paint protection film (PPF)? There are a lot of tips and tricks out there, but we’ll set you straight with the two-bucket method so you can start protecting your vehicle.
Two Bucket Method
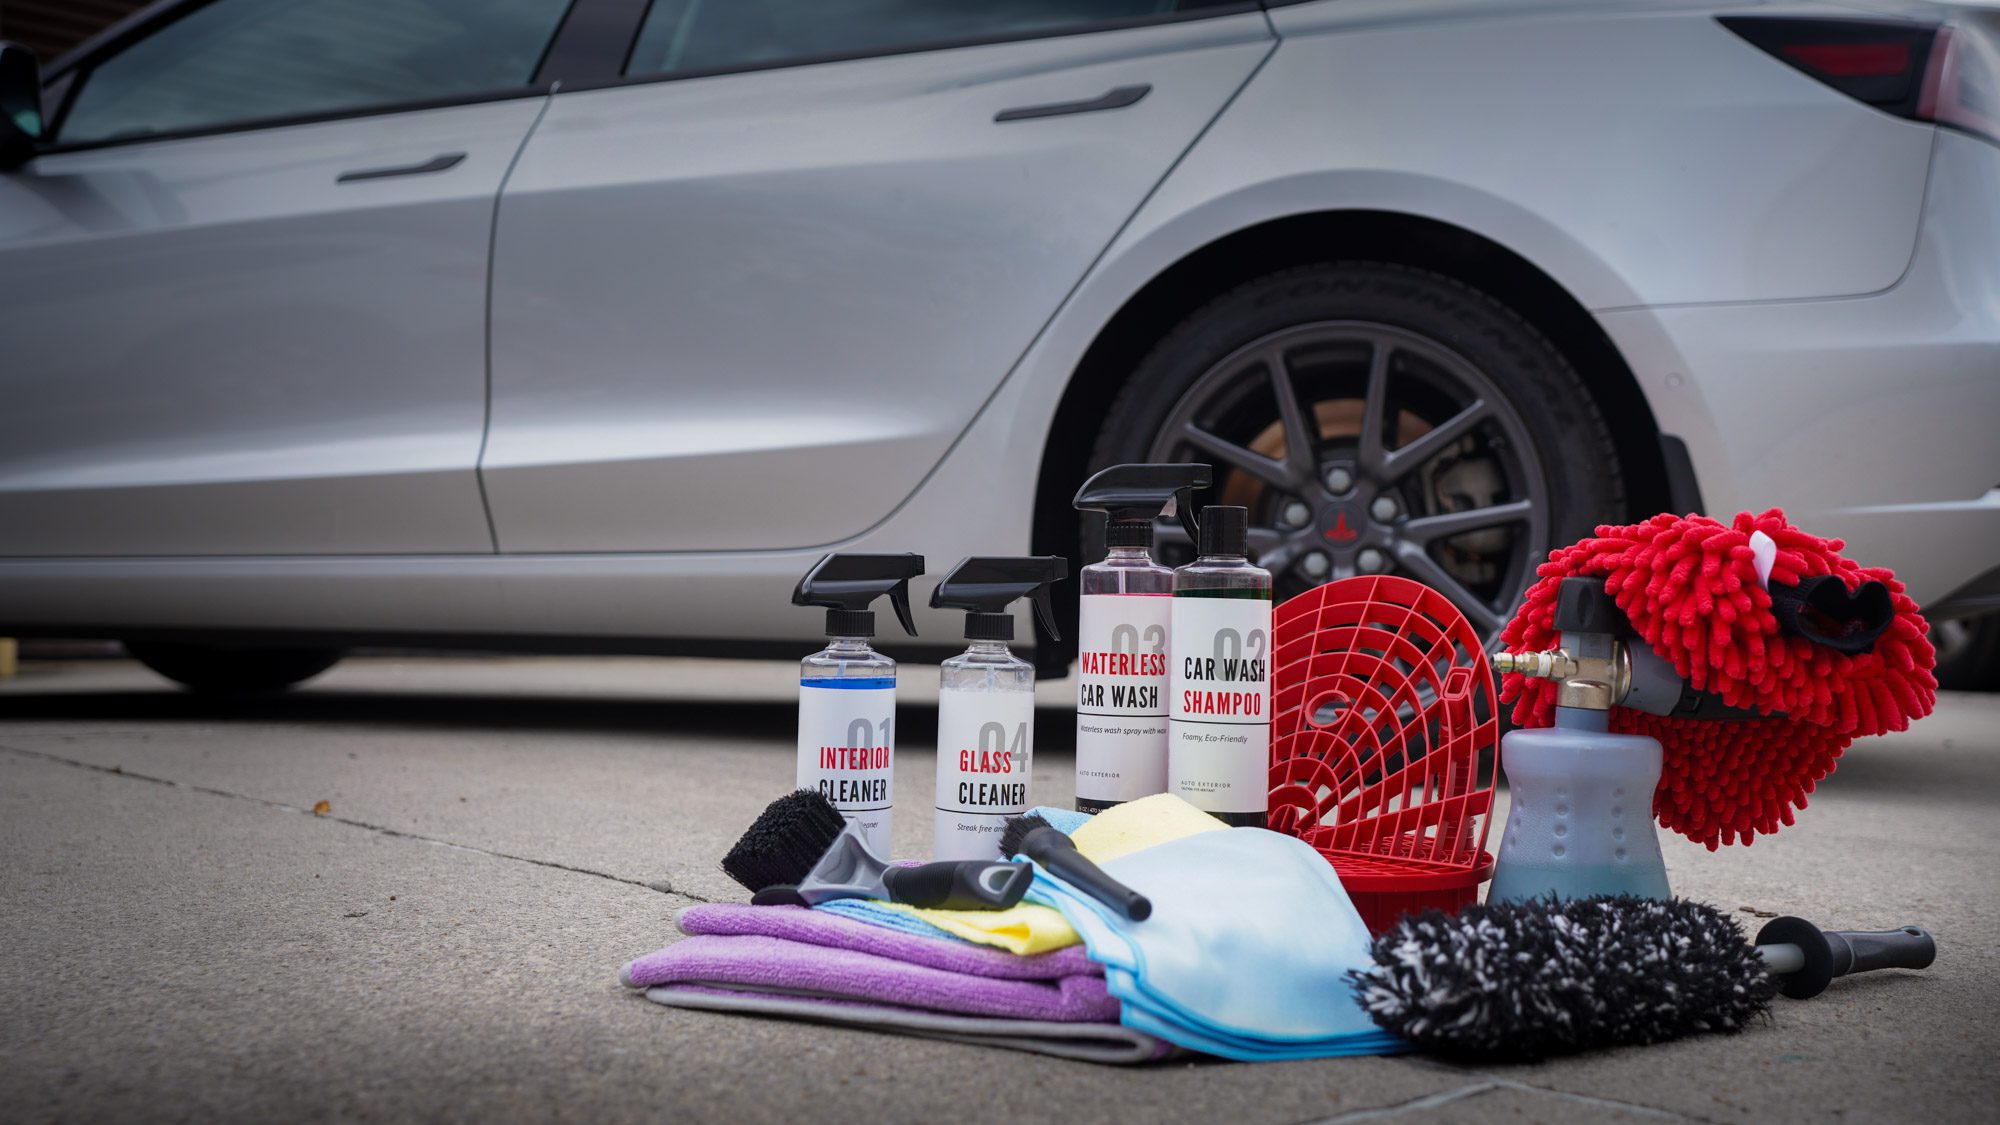
The two-bucket method is a very common method used in the vehicle industry for car washing. It’s exactly what it sounds like – use two buckets to wash the car. One bucket is for the shampoo and the other is for clean water for rinsing. Both buckets should have a grit guard to keep the dirt at the bottom.
By having two buckets, you don’t reintroduce dirt on your car wash mitt, avoiding the chance of scratching your vehicle. When using this method, it’s important to rinse frequently. Usually, if the vehicle isn’t too dirty, I’d wash one panel with my mitt before rinsing it in the bucket.
First Wash
Start by rinsing the vehicle thoroughly. The key is to try to get all bird poop, tree sap and anything on the surface of the vehicle with just water. If you have contaminants on the surface of the vehicle, it can drag across when you run your mitt across. Once it’s rinse, give it a quick inspection and you can do your first wash. Make sure you use pH-balanced car wash shampoo for this wash.
Using the two-bucket method, use a clean wash mitt and dunk it in the shampoo bucket. Wash one panel at a time and make sure you flip the mitt halfway through the panel. Rinse it thoroughly in the rinse bucket and repeat. When washing your vehicle, it’s important you wash top to bottom. The reason for this is that dirt is usually much heavier in the bottom like the rockers. So if you start at the bottom, you have a higher chance of reintroducing dirt, causing scratches on your vehicle.
Even though when installing PPF, you don’t need to wash the windshield and glass, it’s important to clean them as well since it can cause more contaminants in the air when installing PPF.
Degrease Wash
Now that it’s clean, you want to wash it again but with a degreaser or prep wash. This strips any oils or temporary coatings on your vehicles so it’s ready for PPF. This strips the vehicle surface to when it comes down the manufacturing line and will make PPF adhere properly. The process is the same as the first wash but make sure you rinse your bucket and clean it out and use new water when doing this process. Since the vehicle is already clean, this process should be much quicker than the first wash.
Clay Bar
Clay bar are made from synthetic clay that you use with a lubricant (usually shampoo) to glide through and remove embedded contaminants. Your car may look clean now but if you feel it with your fingers, you may still feel bumps here and there. By using clay bar, you remove those contaminants.
There are different levels of clay bar but for DIY-ers we always recommend using the lightest clay to avoid any scratching. I prefer not using a glove on one hand so I can use one hand to feel and the other to glide the clay bar across the surface of the vehicle. Grab enough so you can flatten it out and cover roughly four of your fingers. Use the prep wash soap that you have from the previous wash and spread it out using the mitt. Then glide it across in one direction. You want to avoid going in circles. Every 2×2 section, you want to inspect and knead the clay bar so it doesn’t scratch the vehicle. You want to make sure you don’t go so quickly.
If you are doing this outside, we recommend rinsing the panel as you go so it doesn’t leave any streaks. As you glide it across, feel it with your hand and you’ll feel it getting smoother. Then you can continue to move on, panel after panel, until the whole vehicle is done.
Drying
Most people don’t have access to filtered water fit for a car wash. The reason why water spots tend to occur is that even tap water contains mineral deposits. For context, our house has 200 ppm hardness. At our shop, we use a filter, and it’s less than 10 ppm hardness, which is why it doesn’t leave any water spots. For that reason, drying is an important step. The easiest way to dry a vehicle is to use a leaf blower. I love using my EGO leaf blower to dry my vehicles. If you don’t have a leaf blower, you can get a drying towel or a microfiber and drag it across the surface of the vehicle. Drying towels will usually be very large and soaks up a lot of water very quickly.
Edge Prep
The final step before you start laying PPF is to edge prep. For edges to adhere properly, it needs to be properly cleaned and since edges aren’t as visible, it can hold a lot of dirt and contamination. For edges you can reach, you can spray 70% alcohol on your microfiber and clean the edges using your fingers. If it’s an edge with harder access or in between panels, you can wrap a squeegee with a microfiber, spray 70% alcohol and clean the edges that way. You’d be surprised how much dirt and contamination builds up on those edges.
Ready to Install PPF
It’s a long process but it’ll be well worth it considering your vehicle will be much easier to clean after you install Paint Protection Film. The hydrophobic properties will cause water to sheet right off. If you’re looking to DIY PPF your Tesla Model Y Juniper, you can check out our kits out here. Hopefully this helped for anyone attempting to PPF their Model Y Juniper. Good luck and happy protection.

