
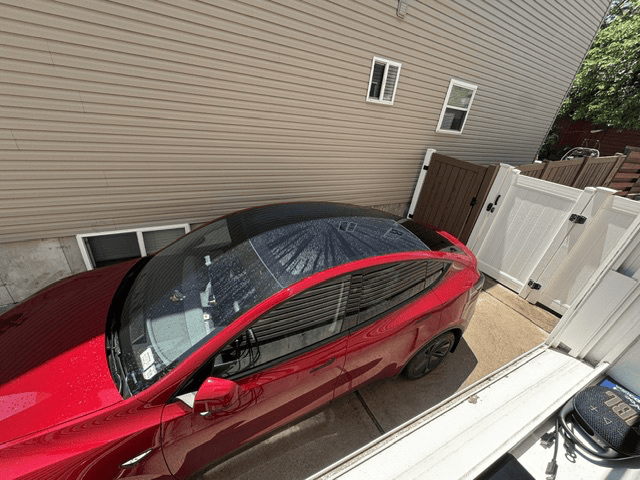
If you’ve ever climbed into a sun-baked Model Y in the middle of summer, you already know the problem: that huge panoramic glass roof turns your cabin into a greenhouse.
It also happens to be one of the most expensive and vulnerable panels on the entire car. DIY tinted roof PPF (paint protection film) is designed to solve both issues at once, cutting down heat while shielding the glass from rock chips and cracks.
Here’s everything you need to know before installing it yourself.
What Is Tinted Roof PPF?
Tinted roof PPF is a clear, tinted TPU (thermoplastic polyurethane) film that’s applied to the outside of your glass roof — not the inside, like traditional aftermarket window tint.
That distinction matters more than it sounds. Standard tint is installed from inside the cabin, which means spraying water and solution right next to Tesla’s sensitive overhead electronics (cameras, wiring). Because roof PPF goes on the exterior glass instead, there’s no water anywhere near that hardware, which removes a real risk that comes with interior tinting.
On top of the tint, the film is also a paint protection film in its own right, meaning it adds a sacrificial layer over the glass itself.
It’s worth noting the film is engineered around Tesla’s laminated roof glass and its thermal expansion behavior. A generic tint or PPF product isn’t built for thermal expansion, which is why we worked with our manufacturers to create a roof-specific kit.
Why the Model Y’s Roof Needs Extra Protection
The Model Y’s panoramic roof is a single, huge sheet of glass, roughly 60 inches long and 45 inches wide, tapering narrower at the back and wider up front. A few things make it more vulnerable than a typical car roof:
- Size: There’s simply more surface area exposed to sun and road debris than on almost any other panel on the car.
- Heat gain: All that glass means more solar heat radiating directly onto your head and into the cabin.
- Rock chips: A single highway rock strike on unprotected glass can crack it, and replacing a Model Y glass roof can run around $2,000.
Newer Teslas do come with some baseline UV and IR-blocking glass from the factory, so this film isn’t introducing heat rejection from zero. It’s adding another layer of thermal and impact protection on top of what’s already there.
Key Benefits at a Glance
- 99% UV and up to 95% IR (infrared) rejection: The film includes ceramic heat-rejection technology that blocks a significant portion of infrared heat before it enters the cabin, along with UV protection.
- Rock chip and crack protection: Acts as a sacrificial layer over the glass, absorbing impacts that would otherwise chip or crack it.
- Tint Sheen Options:
- Light, Subtle: We offer a light blue tint option (71% visible light transmission), so from inside the cabin you won’t notice a dramatic visual change — you’re getting the functional benefits without a heavy tint look.
- Dark, Stealth: We also offer a deep black tint option (17% VLT), so it makes your cabin a bit darker for looks and privacy.
- No interior water exposure: Since it’s installed on the exterior, there’s no risk to the electronics tucked under the headliner.
- Precision pre-cut fit: Each DIY kit is cut to the exact dimensions of the Model Y roof, so there’s no trimming or blade work involved.
Legacy Model Y vs. Model Y Juniper: Know Your Kit
DIY Wrap Club makes two separate kits to match your model year:
- Model Y Legacy (2020–2024): Designed for the original panoramic glass roof shape.
- Model Y Juniper (2025+ refresh): Designed for the updated Juniper roofline.
What’s Included in the DIY Kit
Each kit is built for a first-time installer and includes:
- Precision pre-cut tinted roof film
- Slip solution concentrate
- Scrubby pad for cleaning
- Premium squeegee for installation
- 2 premium spray bottles for solutions
- Step-by-step video installation guides
- Installer support access if you get stuck
How Installation Actually Works
Here’s what the process looks like in practice:
- Set up indoors. This is not a job to attempt outside — dust, wind, and direct sun all work against you.
- Grab a friend. It’s also worth having a second person there to help position the film since it’s such a large piece.
- Clean and hydrate the glass. The roof gets thoroughly cleaned, then sprayed down with slip solution before the film goes on.
- Get the orientation right first. Because the roof narrows toward the back and widens toward the front, figuring out which way the film faces is the first real step.
- Tack the corners down. Anchoring the 4 corners of the film gets everything else to fall into place and keeps you working in a controlled way.
- Stretch into the curve. Because the roof glass is convex, the installer stretches the film slightly as they go, which is what pulls out the “fingers” or wrinkles.
- Squeegee in short, overlapping passes. Unlike vinyl wrap, which favors longer single strokes, PPF installation works better in shorter passes (about every 6 inches) with roughly 50% overlap, pushing water out from underneath.
- Protect the edges. Installers are careful not to let a microfiber cloth catch and lift the film’s edge while wiping down excess water.
- Let it cure. You’ll initially see a haze when looking through the roof. The adhesive needs about 24 hours of sun exposure to fully bake and set before the install looks completely clear.
It’s not necessarily easy, but it’s manageable for someone willing to follow the steps, which is exactly why the kit is designed with detailed video guidance and support built in.
Rear Windshield Tinted PPF
DIY Wrap Club also offers a rear windshield glass tinted PPF option at 71% VLT. We’re keeping it light on purpose. A darker tint there raises real safety concerns for rear visibility, plus you might run into restrictive tint laws. Even though it’s light blue, you’ll still get ultimate protection and heat rejection.
Is DIY Tinted Roof PPF Worth It?
If you park outside often, drive in a hot climate, or just want extra insurance against a cracked glass roof, tinted roof PPF might be for you. It addresses three problems in one install: heat, UV exposure, and impact protection.
Subscribe to our YouTube channel for more tips and updates on tinted roof PPF.


